Saturday, May 29, 2010

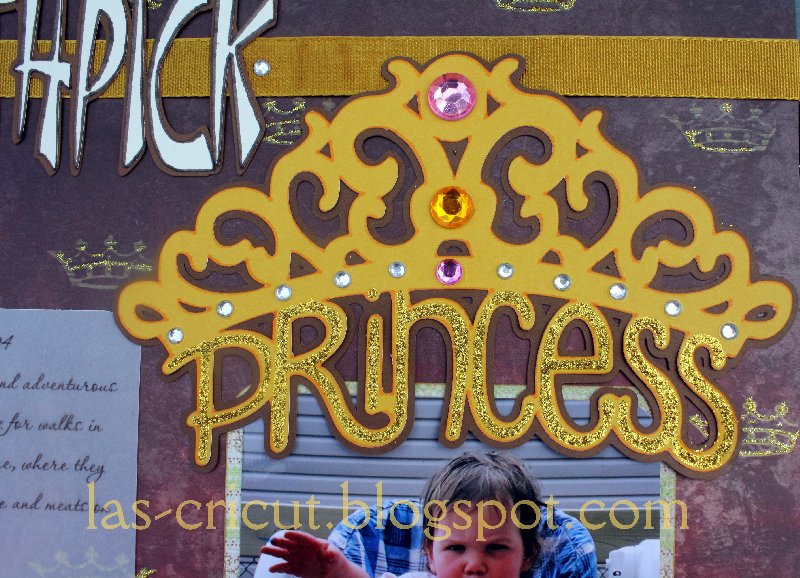
The Toothpick Princess

My DD Hannah, at 2 years old, loved to walk to the grocery store to help mommy shop. In their deli department, she'd eat any and all the samples offered. They were always on toothpicks. Soon, she refused to eat anything unless presented on a toothpick, thus becoming, "The Toothprick Princess"!


Supplies:

Paper: DCWV Once Upon a Time cardstock, coloured cardstock
Fonts: vtks Black ("the"); Chinese Takeaway ("toothpick");
Cricut cartridge: Hannah Montana "princess"
Assorted rhinestones
Stickles, gold
Vellum
Adhesive
Gold Ribbon
Martha Stewart String Lace Punch around the Page

Monday, May 24, 2010

Garden Bug


Supplies:

Paper: My Mind's Eye: Bohemia Backyard "Sunny Days" Floral/Brown
blue and brown cardstock
Martha Stewart Pansy border punch
Light blue stickles
Create A Critter cricut cartridge (for the snail)
Font: Tinker Toy

Saturday, May 22, 2010

CD notebook

I made this little notebook for my daughter, Hannah, who loves to have her little secret place to write and draw. It's also the challenge over at MySheriCrafts blog. Hop on over to see what the rest of the Design Team made, and enter your own project too!
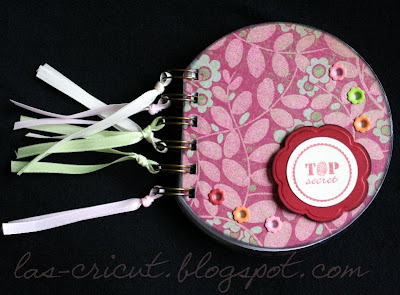
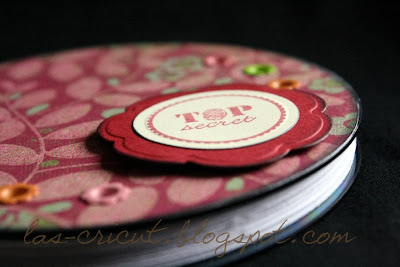
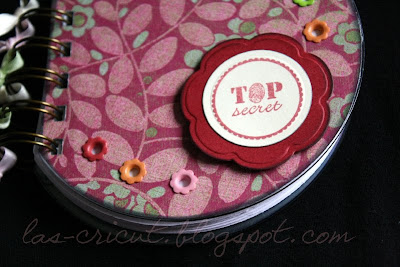


CD Notebook

Supplies:

Cardstock: K&Co Classic K Margo
2 old cd's (or dvds)
Heavy duty scissors
Crop-a-Dile Big Bite
Nestabilities: Circle and Blossom
Colorbox ink: Basics
Ribbon
Bind-it-all and 3/4" O-rings
K&Co Bright Pastels flower 3/16" eyelets
ATG gun and adhesive
White printer paper
Matching solid cardstock
Just-Rite stamps: 1 3/16" Tiny Words, Borders and Centers set and Wood Stamper.

Instructions:

1. Measure 2 cds 4.25" across and draw a straight line with a sharpie. Cut with heavy duty scissors. This creates the binding edge.
2. Cut 2 cardstock circles, 4.65" and adhere one to each cd. Trim off excess at binding edge. Ink edges.
3. Cut about 25 pages of white printer paper 4.55" diameter circles. Use cd as template to trim binding edge.
4. Punch 6 holes in cds and paper, finding the middle and aligning with the middle of the Bind-it-all.
5. Bind with 3/4" O-rings.
6. Embellish binding with ribbons.
7. Using the Crop-a-Dile, punch 3/16" holes along right edge of cds. Set flower eyelets.
8. Using coordinating cardstock, cut a darker nestabilities blossum and emboss. Ink edges. Cut a smaller circle in cream cardstock, emboss, and ink edges.
9. Stamp sentiment using Just-Rite stamps and Colorbox inks. Adhere to front cover below eyelets.
10. Enjoy!

Puddle jumper

My husband refers to these photos as Hannah's escaped mental-illness patient days. That child always wanted to wear what SHE wanted to wear. This was the standard outfit -- raincoat, favorite pink boots and jammies underneath! Fortunately, it fits the day here, where she's off to jump in puddles behind our fence.

This picture was perfect for something I like to do: cut elements into photos. If you look carefully, you'll see I've cut raindrops into the photo, then replaced them on the mat. I also enjoyed using Create A Critter for something different (the title) and one of my all-time favorite cartridges (I love silhouettes!), Nursery Rhyme. Thanks for visiting!


Supplies:

Font: Teardrop
Paper: K&Co Wild Saffron
Blue and cream cardstock
Blue and brown cricut markers
Teardrop.svg (follows post)
Nursery Rhyme and Create a Critter cricut cartridges
Glitter
Glue

Instructions:

1. Crop photos to size, then create a cardstock piece the same size for testing cut on. Arrange teardrop shapes on virtual mat, copy/paste and resize to create double cut lines, then run test cut to ensure proper placement. Adjust if necessary, then cut photo. Back photo with mat, then place teardrop cuts.

2. Cut "Rainaway" (Nursery Rhyme) at 5" on blue. Cut blackout on cream, trim off duck with scissors. Ink edges, or use a cricut marker. Adhere together.

3. Cut "Splash" (Create a Critter) at 5" in cream. Draw with blue cricut marker. Use glitter on the water splash.

4. Arrange all on base cardstock. Adhere. Enjoy!

Sunday, May 16, 2010

Naptime!

Hannah used to go go go go! until she dropped. Here she is in 2004, knocked out on the couch. This LO is the reason I recommend and love SCAL2 to my cricut buddies: even if you're only going to use it for fonts, it's fabulous! One-click shadowing! I made the title in shadowed fonts, then unshadowed and cut with patterned paper. Easy-peasy!


Supplies:

all paper is K&Co Classic K Margo
Fonts: Melanie BT, Cheddar Salad BTN Quill, French Script MT, Pharmacy, French111 BT

Saturday, May 15, 2010

Girl with Doll silhouette

I've working back in time: this is my DD#1, Hannah, in 2004. When I showed her the LO, she thought it was her little sister, who is that age right now. Very sweet. I love the silhouette cuts on Nursery Rhymes and A Child's Year, but I wanted a girl and doll in long grass to match Hannah, so made this one instead. Hope you all like it!


Supplies:
Silhouette girl with doll.svg free download follows this post
Nestabilities: scalloped rectangle
Basic Grey Eva and Granola buttons
Embroidery floss
Ribbon
Brown and yellow cardstock
DCWV Posies Glitter Print cardstock
Chalk
Stamping Ink
Cloud 9 Clear Stamps-Simple Thoughts Girl
Corner rounder
ATG adhesive

Instructions:

1. Cut Silhouette girl with doll 6.5" on pink. Cut again shadowed on brown. Shade with chalk. Glue together.

2. Attach ribbon 1.5" from right edge.

2. Round corners of photos and mats, then mount photos on mat and arrange on layout, overlapping ribbon slightly.

3. Layer Silhouette on top of photo and ribbon.

4. Use nestabilities to cut tag, then stamp sentiment. Chalk edges. Arrange on page with slight overlap.

5. Sew on 6 buttons with embroidery floss.


Thursday, May 13, 2010

Caution!

*** warning, toddler nudity! ***

Again, photos of Hannah from 2004: here she is doing her two favorite things: Being naked, and colouring on the wall. She had her own wall space, and was allowed to colour only there, which worked out well. I have since painted over the site, and I kind of wish that I didn't! Now, at seven years old, she is an exceptional illustrator.... maybe from starting so young?


Supplies:

Paper is unknown -- it came from a big Costco box of paper for my classroom, but fit this LO so well!
Download the "Caution" sign for SCAL2, or make one with GrilledCheese BTN and a rounded square
Cuttlebug Spots and Dots embossing folder
Autumn Leaves Scribbles Alphabet
Memento Rhubarb ink pad
Stickopotamus vellum sticker tags

Most of my files are svgs, but this one is not. It was created in SCAL2.